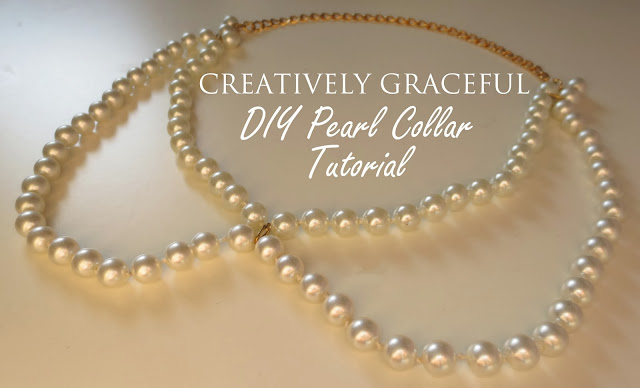
This beautiful necklace, made in Japan, is a family heirloom from the 1950s. It was in the dress-up box until I rescued it for nobler purposes. You know you have become a vintage fashion enthusiast when you realize that the accessory you paired with a tutu, Mardi Gras beads, and rubber boots as a child is actually a glamorous masterpiece that deserves a better view than the plastic walls of a Rubbermaid!
Showing posts with label Collar. Show all posts
Showing posts with label Collar. Show all posts
Saturday, January 17, 2015
Monday, September 08, 2014
DIY Scalloped Series: Collared Shirt
A polo shirt can be updated with this scalloped collar because the piqué frays minimally and holds its shape.
Materials:
Polo shirt
Matching thread
Sewing machine
Tape measure
Scissors
Pencil
Step 1: Measure the circumference of the collar to figure out how to divide it up into evenly sized scallops. I decided to mark my collar every 2 inches because it is about 18 inches long.
Step 2: After measuring and marking draw the scallops in with pencil.
Step 3: Snip along the scalloped line.
Step 4: Top stitch the edge and wear with joy!
Friday, July 04, 2014
Quick Tip: DIY Lace Collar
I turned this yellow linen top into a lemony confection with just a bit of lace. Simply trimming the neckline of a shirt with the same circumference of lace gives it a pretty collar.
Saturday, March 01, 2014
Collared Shirt Repurpose
I had this men's dress shirt kickin' around and decided to experiment with it.
I whacked off the sleeves, picked out the pocket, took in the side seams, hemmed the bottom edge, and finished the sleeves with bias tape.
I was originally going to leave the white collar on the shirt, but its sharp points looked too severe against my face. I opted for a peter pan collar in a calico instead.
Then I stumbled upon a fat quarter of this gorgeous fabric (yes, fruit and polka-dots!) and knew it would be perfect for the embellishment.

And here's the result!
Sunday, December 01, 2013
DIY Pearl Collar Necklace
Materials:

A bracelet chain with a clasp
4 jump rings
A shorter string of pearl beads (mine was 10'')
A longer string of pearl beads (mine was 17'')
Pliers
Step 1: Secure the two strings of pearls with a jump ring at their centers.
Step 2: Fasten one of the ends of the two strings of pearls together with a jump ring, leaving one pearl free on the longer string.
Step 3: Attach the non-clasp end of the bracelet to the longer string of pearls with yet another jump ring.

Step 4: Use the final jump ring to secure the other two ends of the two strings of pearls together, again leaving one pearl free on the longer string. That pearl will hold the clasp to close the necklace.
There you have it! A classy collar necklace to dress up even the simplest t-shirt.
Subscribe to:
Posts (Atom)


